Saturday, May 3, 2014

Tyranid Invasion Campaign Report 2


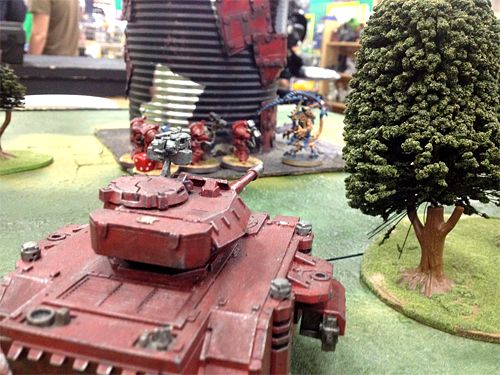
A lone Rhino escaped the vanguard strike of the Tyranids which had burst from the sentient jungles of Severus laying waste to a military encampment and giving a Death Company commander his much desired end. Many miles away, the Rhino skid to a stop at a collection of silos where the sap used by the Imperials to protect their people from the radioactive sun was stored. A warning had to be given to the Blood Angels force operating there but then, Sgt. Slaughter heard a rustling in the trees he did not like. And thus our second game of the campaign was begun. We again started the session with the Kill Team mission Forward Push, but this time we used the deployment rules from the Tyranids Altar of War mission First Contact.

Forward Push


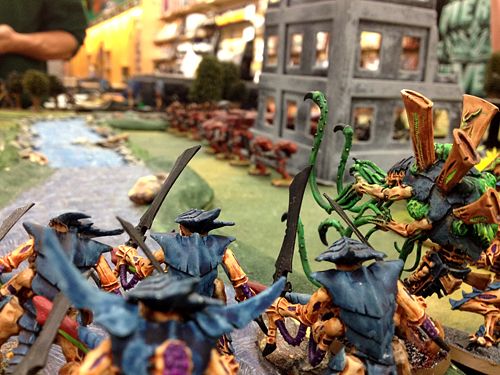
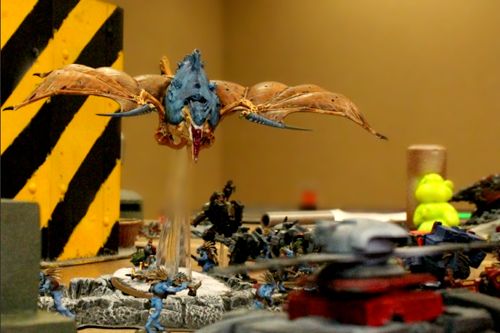
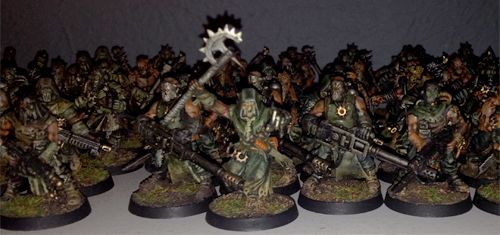
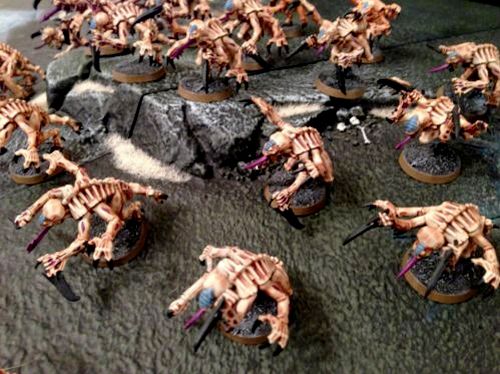
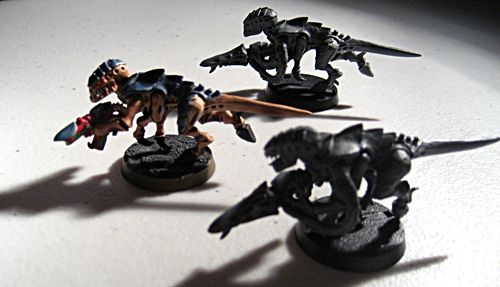
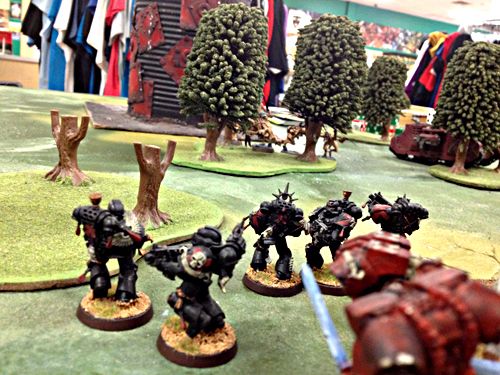
The Blood Angels fielded the exact same list for this Kill Team as the previous one with Sgt. Slaughter getting A Cunning Ruse but choosing not to use the Outflank it provided and taking the same specialists of his Krak Missile Marine with Master-Crafted, Flamer Marine with Poison 4+ and Bolter Marine with Preferred Enemy. Tyranids took a similar list as game 1 with the only differences being 2 less Gargoyles for an additional Genestealer. The Zoanthrope Leader rolled Unshakeable Dedication to Duty giving him the Zealot special rule. I also took the same specialists of 1 Genestealer with Shred and 2 Gargoyles with Pinning and Rending. We set up 4 objectives in the middle of each 2x2" segment and Blood Angels deployed first, rolling for each model to see which of the 4 segments they would deploy on. We decided the Gargoyles could Deep Strike on Turn 1 with the quasi-ambiguous writing in the Altar of War mission and basically all the Tyranids arriving on the board as if they were coming from Reserves (we knew Kill Team doesn’t normally allow Deep Striking, but with the odd deployment we figured we’d give it a shot). We also decided Synapse would be unnecessary for the Tyranids as there was only a single synapse creature in the list and the likelihood of all the Tyranids being able to be deployed in a manner where the 12" range of Synapse would be worthwhile was small. I rolled for each model and deployed them all with every single Gargoyle Deep Striking and the battle began.

I lost a couple of Gargoyles through Dangerous Terrain tests when they Deep Struck into terrain. T-shirt saves left neither of the 2 who failed standing. I sent one of my Genestealers for a nearby objective on my side of the board with a Gargoyle going after another the second objective on my table side. I shot with all the Gargoyles near the Blood Angels in the 2 tiles near my edge but Power Armor repelled Fleshborer shots with ease. I then had my Zoanthrope cast Warp Blast, covering 2 Blood Angels, one of which was the missile launcher specialist which had killed my Leader in the game 1 Kill Team mission. The first Blood Angel went down but the missile launcher got a cover save from his fallen buddy and passed! The Krak Missile Marine shot one off at the Zoanthrope but the creature’s invulnerable hide blocked it from taking out my Leader. The rest of the Blood Angels laid waste to a Genestealer and 2 Gargoyles. We then went on to turn 2 and Tyranid vengeance.


The Tyranids surrounded the Blood Angels Leader as well as two of their specialists and I moved one of my Gargoyles onto a third objective. The Gargoyles then unloaded with every Fleshborer shot they had, killing the flamethrower specialist. I then charged a Gargoyle and Genestealer into the Krak Missile specialist and did the same to Sgt. Slaughter. No Overwatch landed and while I lost a Gargoyle to the Krak Missile Marine, the Gargoyle on the Blood Angel Leader wounded with his Hammer of Wrath and Sgt. Slaughter failed his save, dying ignobly before the fight had even properly begun! On the Blood Angel turn, my opponent knew I’d have to start making Break tests if he just killed 3 more of the Tyranid forces. So he sent his Bolter group near my Zoanthrope to kill 2 Gargoyles and the Blood Angel that wasn’t locked in close combat near the slain Leader’s corpse fired rapidly into the Gargoyle which had brought Sgt. Slaughter low and ended the Tyranid’s miserable life. I got some retribution in close combat as the Genestealer locked with the Krak Missile launcher slashed the Marine’s head off.

On my turn I had to start making Break tests and I lost all 3 of my objective holders, which I expected with the low-leadership Gargoyles but I rolled an 11 on the test for the Genestealer holding the objective in my corner. I used what was left of my forces to kill the last Blood Angel needed to cause the Imperial forces to also make Break tests. On the Blood Angel’s turn only a single Marine failed his leadership test and ran from the combat. The rest picked off the few remaining Gargoyles and the rest assaulted the Zoanthrope who was caused so many wounds not even his invulnerable hide could repel them all and the Tyranids were wiped from the table with both sides achieving Slay the Leader and Break the Enemy. Since there were no Tyranids left on the table we declared the tie to be a victory for the Blood Angels, allowing the Imperial player to deploy a Quad-gun on a randomly selected 2x2' tile, 3" from any tile edge.

First Contact


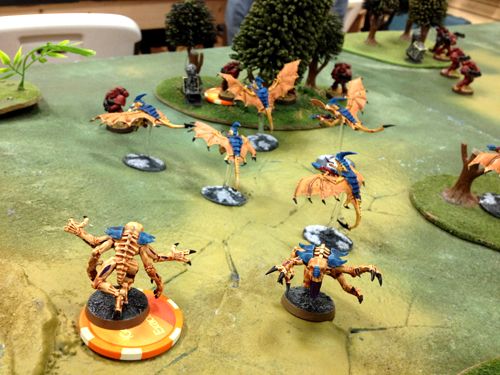
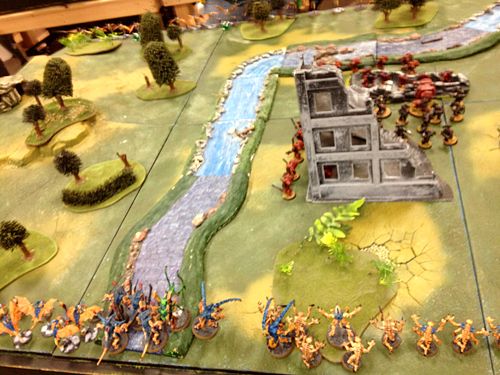
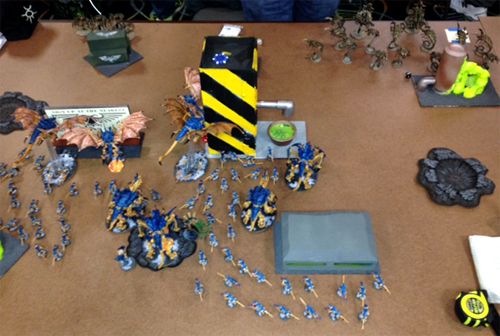
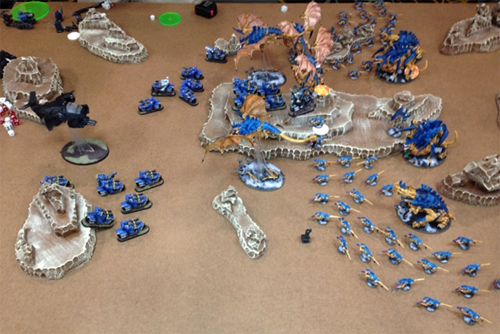
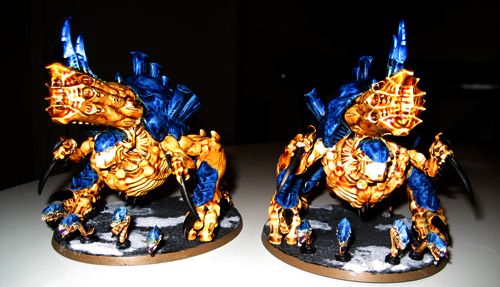
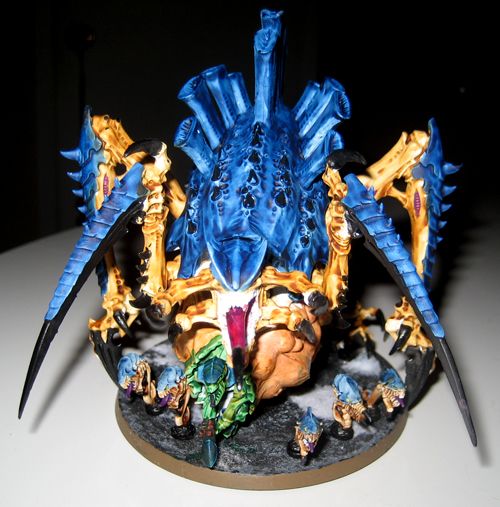
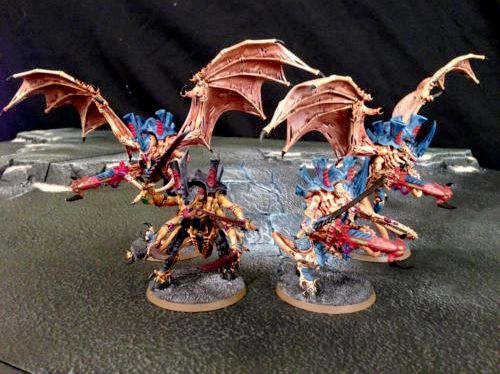
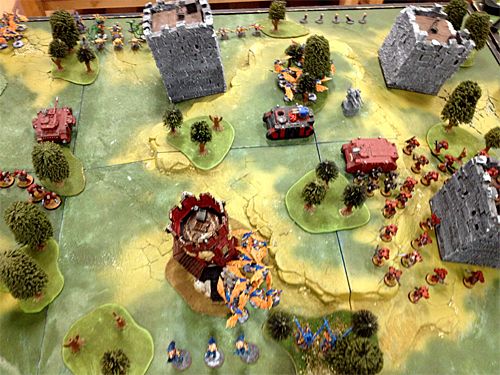
This mission’s deployment was identical to the one we used for the Kill Team prelude with the Blood Angels rolling for each unit to see which tile they’d end up on. The majority of the red Space Marines ended up on tile 1, including a unit of Death Company, a Rhino filled with Tactical Marines, 2 units of Jump Marines with one unit having the Blood Angel Warlord and Apothecary and finally a Tactical squad deployed on the objective. A unit of Terminators ended up on tile 3, a Predator on tile 4, a Razorback on tile 5 and the Quad-gun on tile 6. The Tyranids similarly rolled for each unit, but unlike the Space Marines they had to walk onto the board from a table edge on the tile rolled. 1 Lictor was the only Tyranid to end up on tile 1, 2 more Lictors, the Zoanthropes and a Gargoyle brood were deployed on tile 2, my Prime Warlord and his entourage of 3 Warriors, a unit of Genestealers and a single Lictor moved onto tile 3, Spore Mines walked onto tile 4 near where Gargoyles had Deep Struck onto and the remaining Lictor, another group of Spore Mines, 2 units of Genestealers one unit which had Scything Talons and a Broodlord as well as both Venomthropes deployed on tile 5 with the last unit of Spore Mines moving onto tile 6 and the last unit of Gargoyles Deep Striking very near the Quad-gun. Deathleaper was held in Reserves.


On tile 1 I moved the Lictor towards the Tactical Marines holding the objective, but since it could not charge the turn it comes in from Reserves (which considers the Tyranids to have deployed as) he just ran up against the silo they were standing on. I moved the Gargoyles in tile 2 to create a buffer for my Zoanthropes which also advanced with the Lictors staying in the forest as they too could not assault. The Zoanthropes attempted to destroy the Rhino with a Warp Blast Lance but he vehicle made its Deny the Witch roll! My Genestealers and Lictor in tile 3 advanced towards the Terminators, as did the Warriors which unleashed their Deathspitters killing a single heavily-armored Imperial. On tile 4 the Gargoyles and Spore Mines advanced and ran towards the Predator followed close by all the units on tile 5 but for a single group of Genestealers which moved and ran to claim the objective on top of the silo in the middle of the tile. The Gargoyles on tile 6 ran to surround the Quad-gun and deny the Blood Angels its use with the Spore Mines moving and running to engage in a later turn.

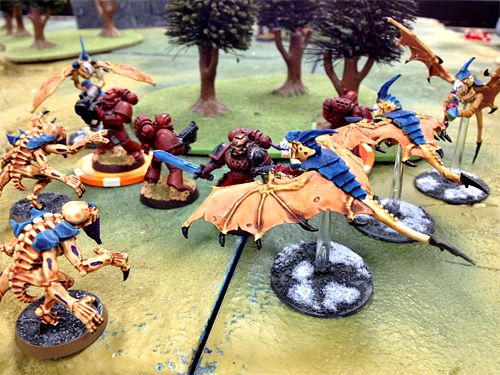
The Blood Angels Death Company moved towards the Gargoyles on tile 2 and fired pistols into them killing a few and assaulting the rest causing many casualties and taking none. The Assault Marines with the Warlord advanced with their Jump Packs towards the Lictors, popped a few pistol shots and then did a multi-assault into both. The Lictors killed a few Imperials but the sheer weight of the Marines brought both Tyranid assassins down. The Predator in tile 4 unleashed a volley at the Genestealers killing only 1 and the nearby Terminators then assaulted them, wiping out the squad and taking no casualties. The Marines in the Rhino and Razorback both got out and shot at the Gargoyles around the Quad-gun with the Assault Marines moving closer and also unloading wiped out the entire brood.

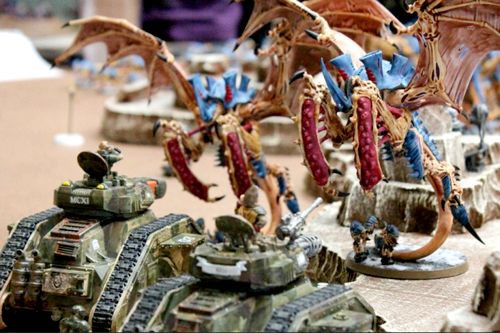
The Tyranids responded with the Lictor in tile 1 passing its Synapse check, assaulting and killing a scant few Marines and taking as many wounds for a tied combat. The Zoanthropes moved as far away from the Assault Marines which had killed the 2 Lictors on tile 2 and cast Warp Blasts removing the entire squad but for the Warlord and Apothecary who made their morale check. The Death Company in tile 2 finished off the Gargoyles and consolidated towards the Blood Angels Warlord. The Prime, Warriors and Lictor on tile 3 blasted away at the Terminators but their armor was enough to stop the death which was pit at them. They then assaulted the Terminators but the Prime was not engaged with the Terminator Sergeant and could not challenge. One Blood Angel Terminator was felled but the rest focused their attacks on the Lictor and felled him with a Thunder Hammer. The Gargoyles on tile 4 passed their Synapse check and jumped behind the Predator, unleashing their Fleshborers in the rear armor but only causing a single glance. The Spore Mines advanced but as the Gargoyles were in the way were out of charge distance to affect the Predator. One of the Venomthropes failed its leadership test and moved towards the Predator but was out of charge range. The Genestealers with the Broodlord and Scything Talons advanced and charged the tank but completely whiffed on armor penetration. Deathleaper Deep Struck in and landed exactly where I needed him to, right next to the Quad-gun. He took aim with the weapon at the Razorback, landed a glance and penetrating hit which were negated by cover saves from intervening models.

The Tactical squad on tile 1 took a couple more casualties from the Lictor but robbed it of its last wound and secured their objective. The Death Company with the Warlord and Apothecary fired at the Zoanthropes, burrowing a bolt in one of the creatures’ hides. They then charged and between the Death Company attacks and Blood Angel Warlord’s Power Sword the Synapse creatures were vanquished. On tile 3 the Terminator Sergeant did not issue a challenge but the Tyranid Prime did. A single wound was delivered to the Sergeant but his Lightning Claws caused two wounds to the Prime in return and a Warrior was felled by the same Thunder Hammer which had previously killed a Lictor. The Predator reversed away from the Gargoyles and fired at them killing only 2. The Razorback, Tactical Squad and Assault Marines blasted at Deathleaper but only a single Bolt round landed. They then charged and the wave of Powered Armor Marine brought the elite Tyranid assassin down.


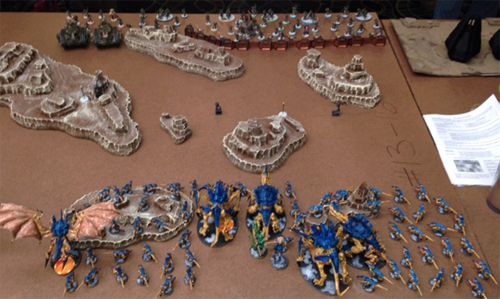
On the next turn the Tyranid Broodlord moved towards the melee the Warriors were locked in and rushed in. The Broodlord challenged the Sergeant and quickly ripped his Lightning Clawed arms off with the rest of the Genestealer brood slashing though the other Clawed Imperial’s helmet. Only the Thunder Hammer Terminator was left and he eliminated the Warriors with devastating swings. The Gargoyles on tile 4 failed their Synapse check but were only too happy to leap behind the Predator again and caused a Penetrating hit which shook the tank. The Spore Mines nearby were aided by the Gargoyles’ wings and impacted into the tank, wrecking it to scrap. The final Lictor on tile 4 passed his Synapse check and moved up to secure a second objective. The other Spore Mines on tile 5 started their slow move towards the Razorback while the Venomthropes failed their Synapse check and grovelled in place. The Spore Mines on tile 6 similarly crawled towards the Assault squad which had brought Deathleaper low, but failed to make a charge.

The Death Company and Blood Angel Warlord advanced and ran towards the melee occurring between the Terminators and Genestealers only to witness the Genestealers decimating the final Terminator and consolidate in the nearby forest. The Razorback and Tactical Marines on the Quad-gun pumped shots into the Gargoyles and removed them from the field. The Assault squad near the Spore Mines on tile 6 fired, killing 2 and then charged resulting in a massive bio-explosion which ended a couple of Marine lives. They then consolidated towards the closest silo with an objective.

Following that, the Tyranid forces were down to the wire with 2 objectives being held and only a single unit of Genestealers and Spore Mines moving about the board as the Venomthropes still could not do anything more than twitch their tendrils. The Genestealers assaulted the Death Company and several of the squad met the end they so craved. The small Genestealer squad took a punishing amount of wounds leaving only a single Genestealer and the Broodlord standing. The Spore Mines continued to sluggishly move towards the Razorback but the distance between the tank and the floating Xenos was still too great for them to successfully assault.

The Blood Angels Warlord took another wound from the Broodlord but responded with his Power Sword, unceremoniously lopping the Tyranid’s head to the ground. The Razorback and Tacticals on the Quad-gun sent death to claim the Lictor holding the objective on tile 4 and the Assault squad on tile 6 jumped to claim the objective there. The game was then called with the Blood Angels scoring Slay the Warlord and 2 objectives and the Tyranids holding only a single objective. The reward for this result is that the Blood Angels will l add 1 to their Table Sides roll in the Apocalypse finale.

Conclusion

This was a brutal match for the Tyranid forces as the deployment shift kept many of my units out of Synapse. Though some tactical moves were made to secure the Quad-gun I was never able to hold onto it long and only managed to fire it once, which did little to change the flow of the Blood Angels massacre. The score of the campaign is now tied and I cannot wait to see how the next session plays!

Sunday, April 6, 2014

Tyranid Invasion Campaign Report 1


Played the first session of the Tyranid campaign with a friend who mustered a force of Blood Angels brave enough to stand up to the invasion of chattering devourers. The session began with a Kill Team game of Forward Push followed by the first mission in Tyranid Vanguard Rising Leviathan 1, the Screaming Forest. We altered the fluff of the Rising Leviathan dataslates to match our armies. Some of these changes were minor, such as the name of the planet the invasion was taking place on was Severus (named after my Hive Fleet) instead of Satys. This planet still had the sentient trees whose sap provides protection from the radiation pumped out by the nearby star, but instead of being defended by Imperial Guard, Space Marines and a handful of Blood Angels, our version had the main defense force be Blood Angels with a call for aid sent out to a ship with Ultramarines and a Knight.

Forward Push


Hive Fleet Severus Kill Team

Troops 

Genestealers x5

Elite

Zoanthrope

Fast Attack

Gargoyles x13

Blood Angels Kill Team

Troops

Tactical Squad x10, 1 Sgt w/ Power Fist, 1 Flamer, 1 Missile Launcher

To start, my opponent chose his Sgt as his leader and I chose my Zoanthrope. Humorously, we both rolled a 2 for the Leader trait resulting in both of our leaders able to seize the initiative on a 4+. The Blood Angel player gave his Missile Launcher the Master-crafted special rule, the flamer the Poisoned 4+ special rule and one of his Bolter marines Preferred Enemy. I gave one of my Gargoyles the Rending special rule, another could cause Pinning and a Genestealer got the Dirty Fighter trait, Shred. The Blood Angels player won the roll and got 2 objectives to my 1. We set up the board and started the game with Tyranids deploying first. I set up my 13 Gargoyles in the front with the Zoanthrope behind. The Blood Angels deployed conservatively near their objectives and I infiltrated my Genestealers as close as I could get them. We were in range to discover what the mysterious objectives were with both the Blood Angels' objectives being bombs and the Tyranid objective halving assault distance. We were also using the Jungle Events table from the Screaming Forest mission in this prelude game.

Despite being a Quick Thinker, the Blood Angels Sgt was unable to steal the initiative from the Tyranids and the Gargoyles moved up. 3 of the Genestealers were in a river that gave Feel No Pain and ran near the Blood Angels deployment. The ran through the river with the intent of using the cover provided to suffer the Bolter barrage that was surely coming. And boy did it come, but not before my opponent had his missile launcher target my Zoanthrope. One failed Invulnerable save and the Blood Angels scored First Blood and Slay the Leader. The Bolters then killed some Gargoyles and 2 Genestealers. On the Tyranids turn I was having to make Instinctive Behavior tests and 5 of my Gargoyles decided to Go to Ground. A jungle event occurred with an insect swarm besieging the Blood Angels leader but not doing him any harm. The rest of my force pushed up and I managed to get 3 Gargoyles into close combat with the Blood Angels Guerilla Specialist. The tactical marine was unable to wound my Gargoyles and his power armor saved him from a biting death. The saving grace was one of the explosions from the objectives managed to kill a marine.


On the Blood Angels turn, more withering Bolter fire decimated the Tyranid forces causing Break tests to be made. I got a Genestealer into close combat with the same marine the Gargoyles had been fighting and he made short work of the power armored soldier. The return salvo finished off my forces with 19 dead Tyranids to only 3 dead Blood Angels. With the Imperials able to win the Forward Push they were able to get intel back to their base and halve one of the Tyranid deployment edges in the main game.

The Screaming Forest


Hive Fleet Severus 

HQ

Tyranid Prime Boneswords, Deathspitter, Flesh Hooks, Adrenal Glands

Deathleaper

Troops 

Genestealers x5 w/Broodlord Scything Talons x6
Genestealers x5
Genestealers x5
Warriors x3 Boneswords x3, Deathspitter x3, Flesh Hooks

Elite

Zoanthrope x3
Venomthrope
Venomthrope
Lictor
Lictor
Lictor
Lictor
Lictor

Fast Attack

Gargoyles x10
Gargoyles x10
Gargoyles x10
Spore Mines x5
Spore Mines x5
Spore Mines x5

As you can see from the list above, I took 3 formations from the first Tyranid dataslate: Deathleaper's Assassin Brood, Broodlord's Hunting Pack and Gargoyle Bio-bombs. My opponent didn't have a printed list, but he took a squad of Death Company, a Tactical squad in a Rhino, a Dreadnaught, a Devestator squad, a couple of priests which gave Feel No Pain and his Warlord was with the Death Company as well. In this mission the Blood Angels goal is to flee the impending doom from the gribblies coming out of the sentient forest. The Imperials had received advanced notice of the invasion and as such they were able to set up a perimeter pushing the Tyranid deployment from a table edge back. I was using a Tyranid Prime as my Warlord and appropriately rolled Nature's Bane which allows my Warlord to turn one of the many pieces of jungle terrain into a carnivorous jungle each turn. The Blood Angels, Death Company Warlord also appropriately rolled on the Dust of a Thousand Worlds trait which gave all friendly units within 12" Move Through Cover. For psychic powers one of my Zoanthropes rolled Catalyst, which always proves handy in the game.


The Blood Angels went first and the Fast Rhino with Dozer Blades plowed right through the river, which we found to be dangerous terrain which allowed re-rolls to armor saves. His jump pack marines then jumped over the river. The Death Company advanced a bit forward and his second squad of jump marines pushed into the river towards my Zoanthropes. The Devastators unleashed on the Zoans trying to take them out as they were my Synapse for that table edge, but the Hive Mind was not willing to let any of the trio die. The Assault Marines that had moved towards them did more damage with a pistol, causing a single wound. On the Tyranids turn the Broodlord cast the Horror on the jump marines which were in the middle of the board and the Zoanthropes cast Catalyst on themselves and the Genestealers nearby. Everything then advanced towards the middle of the board. I unleashed 2 squads of Gargoyle Fleshborers at the pinned marines but their re-rolling armor saves and Feel No Pain meant not a single one fell. Not even the Warrior's Deathspitters could get past that clutch defense. I had a bit more luck on the other table edge as I got my Genestealers and 2 Lictors into assault with the jump marines which had moved towards them. A few marines died horribly, but bravely stayed in combat.

The next turn the Rhino plowed off the board scoring 2 victory points for the Blood Angels, 1 for the transport and 1 for the troops inside. The Dreadnaught took potshots at the Zoanthropes but again they shrugged it off. The Death Company marched towards my Broodlord's Genestealers and charged in. Because of the higher initiative on the Genestealers, many a marine died gruesomely to rending claws. The Death Company had their revenge though as they killed all 5 of the Genestealers but the Broodlord. On my turn the Zoanthropes cast Warp Blast and caused the Dreadnaught to explode, scoring the first point for the Tyranids. I assaulted the jump marines which had been pinned the previous turn with 2 groups of Gargoyles, hoping to stall their move towards escape. Another group of Genestealers as well as 2 Lictors and a Venomthrope joined the melee with the Death Company and the Broodlord screeched a challenge which the Blood Angel Warlord accepted. Between the Lictors, Venomthrope and the Genestealers the entire unit of Death Company was wiped out, tying the game score. The Broodlord and Imperial Warlord traded wounds but the Blood Angel knew things had turned grim as he was surrounded by ravenous beasts which would cheer on the Broodlord. On the other side of the board 2 Lictors caused a few wounds but the marines in the river kept fighting with their re-roll armor saves sparing them.

The game went on for 2 more turns as every Imperial was engaged in close combat with Lictors, Genestealers and Gargoyles. The Blood Angels jump infantry in the middle of the board was hit with a group of Spore Mines which killed 2 marines that were not in the river. The remaining marines in the combat managed to clear out one of the Gargoyle broods but 3 Gargoyles remained in the river from the second squad. The Lictors killed a few more marines in the other river engagement, then Hit and Run towards the Devastator squad. The Genestealers in that same engagement lost a member but also benefited from the re-rollable armor saves and the Feel No Pain the Zoanthropes had again gifted them with. Things looked grim for the Imperials as they could not push through this immense wave of Tyranid bodies and the game was called when the Broodlord ripped the Death Company Warlords heart out and ate it. The final score was Blood Angels 2 and Tyranids 5. The reward for this result is Tyranids will add 1 to their Deployment roll in the Apocalypse finale.

Conclusion


This was a great start to the campaign as it allowed me to take a lot of units I have never had a chance to play before with the new Tyranids codex. The Gargoyles, Lictors, Warriors, and Genestealers were all an interesting mix of units I would likely not take in a competitive game. But with the formations in these dataslates and the narrative thrust of the campaign, they fit perfectly and did an amazing job wiping out Blood Angels! For the Kill Team missions, my opponent and I are discussing removing Synapse from the small points games so I can take more of a variety of units. I can't wait to play the next session to see how the invasion progresses!

Saturday, March 29, 2014

Anatomy of a Campaign

Having played mostly competitive tournament 40K with a sprinkling of Apocalypse games mixed in, I’ve wanted to play a narrative campaign for some time. I’ve had the Crusade of Fire book Games Workshop released last year, but I was too new to the scene in Austin to get in on the game when other local 40Kers played it. Well, now that I’m all in with my Tyranids and the last Dataslate with extra missions focusing on the invasion of Hive Fleet Leviathan, I decided now was the time to work up a campaign of my own. As with all worthwhile things, the first step was research and here’s what I’ve found to be necessary for embarking on a narrative journey in the 41st Millennium.

Story


Unsurprising to some, the first thing you need to construct your campaign is the seeds of a story. If your plan is to string missions together from Dataslates, gathering elements for the story won’t be very difficult. There are pages in each Dataslate describing the dangers the Imperial world of Satys was threatened with from Hive Fleet Leviathan. If you’re creating your own story from whole cloth, you’ll have to work a bit harder. The starting point is what the thrust of your narrative will be about, whether a Xenos invasion of an Imperial world, a chaotic rebellion leading to a sector-wide civil war, or the reclamation of a pivotal artifact whose use could affect the fate of billions. After you’ve decided the main conflict you’ll need to fill in the details of what factions are vying against each other. If you’re planning on including more than 2 people in your campaign, this is a great opportunity to play with inter-faction combat as well. Imperials may team with Eldar against an army of Chaos Marines and Daemons, but just because they have a common foe does not mean each Warlord does not have his own goals to achieve. In my years of being an RPG GM, I’ve found it doesn’t matter what the campaign idea comes from as long as it fulfills two things — promoting conflict and allowing the players to affect it.

Setting


Once you’ve got the initial idea down you should then focus on the setting for the campaign. Will the battles be fought on a single world or on several worlds throughout a sector? Will there be engagements on space stations where gravity has little hold or on a Daemon world where the laws of physics barely apply? The setting for your world is a great way to introduce variety in how the games play and I’m a big fan of planetary conditions having influence on the narrative you’re forging. From Hive worlds to Death worlds, you’ve got a lot you can pull from and you should use every element you think will make for a fun game. Especially if there are elements you can use in more than one battle which can help create a cohesive feel for the conditions the armies are being met in. If your campaign lasts for more than 6 sessions and you can include these sorts of elements throughout different locations your players will enjoy experiencing the familiarity of challenges each location provides. As the wise games developer Andrew Greenberg has said, “the setting is often the most engrossing part; take full advantage of it,” and the galaxy in Warhammer 40K is no exception.

Creating Missions


With so many Altar of War Dataslates as well as supplemental Codexes having additional missions, it shouldn’t be difficult to use any one with your planetary conditions inter-mingled. At a base level, simply doing this with one of the 6 missions in the main 40K rulebook can give you a wildly different game than you would see if you played a book mission straight. If you do not have access to any Dataslate missions you can combine 2 of the main rulebook missions to vary game play, just remember there should be a narrative point to each and every engagement. Perhaps you’ve decided to merge the Emperor’s Will mission with the Relic mission. Instead of just playing them as is, you could make it so your force has to take the Relic, which is a dangerous bomb, and must deliver it to the location of your opponent’s Emperor’s Will objective and clear out its defenders so the bomb can be set. You can also use the narrative itself to give bonuses to the armies fighting it out. For example, in the last stage of a Tyranid invasion you could give each of the ‘Nid Troops, Elites and Fast Attacks the Endless Swarm rule and the beleaguered defenders know the fate of the entire world is on the line and have the Zealot special rule to show their heroic fortitude. There is no limit to what you can do as long as fun can be had by all the players involved.

Different Ways to Play


The next thing I’ve considered is involving several of the variations of playing Warhammer 40K available to play my campaign. With a Tyranid invasion I decided I would use Kill Team missions as a prelude to each major engagement. In this way it would be like a scouting party had come across the vanguard of a larger invading force. If there was a planetary condition I would use that in the Kill Team prelude, then I selected one of the six Kill Team missions that would best complement the main invasion mission. I then created a victory reward for the the Kill Team mission that would be used in the main mission, setting stakes on the line to give further incentive for winning the prelude. Next, a full-size game of 40K would be played with all the setting conditions and Kill Team results applied. The winner of the main mission would receive a bonus for the climax of the campaign, which I set as an Apocalypse game. In this way, a tally would be kept throughout play of which bonuses each player would get for the apocalyptic finale in the campaign of 6 sessions with Kill Team and full-size 40K. Your campaign can be further expanded with 40K supplements such as Cities of Death and Planetstrike. In the end, you have a multitude of options available to play out the events of your campaign and there is nothing stopping you from creating even more.

Well, that’s my game plan for running this invasion campaign. Seasoned narrative players will have noticed I’ve not mentioned dedicated GMing or branching path engagements but perhaps in the future after I’ve tested this campaign I’ll explore those options as well.

Tuesday, March 18, 2014

The Painting Fork in the Road


In January I found a paint scheme I liked as a starting point for my Tyranids and rushed to get the job to a table-top standard for a tournament in March with plans to finish all 77 models before the next big tourney. It was a great plan until I started getting complemented on the paint job at Railhead Rumble and received a solid paint score. When I got back home and played some local games, random people shopping at Dragon’s Lair stopped and gaped at my models, offering praise and snapping pictures with their phones, as well I won Best Painted at a local tournament at Wonko’s Toys and Games. That planted the seed of doubt in my mind that I didn’t need to push my paint job further, which would darken the lighter blue color quite a bit, and should just finish the models with the lighter blue in mind. I had approached a fork in my hobby road. Do I switch down the path which was getting me complements or stay the course which would be more involved and may not be as well-received?

Pros to Taking the Fork


Most of the way there with my models and can move right in to fine detail work saving time and energy. This is a huge boost as I plan to add at least 31 models to my 1850 list for the Alamo GT now that Dataslates are allowed in that tournament.

Color scheme has been well-received by opponents, random lookers and tournament organizers. As I said above, I’ve gotten an overwhelmingly positive response to the lighter blue scheme as it is now, so the paint scheme seems to be working as is.

It is a quick painting process that can be replicated on future models easily. I was stunned with how easy the method I used on my ’Nids was. Prime white, hit the exoskeleton parts with two coats of Seraphim Sepia. Hit the shell parts with Drakenhof Nightshade. Paint the talons with Abaddon Black and then the rest is just varied detail work.


Cons to Taking the Fork


Some of the models in my army have already been painted to the next step and would have to be stripped or not look cohesive. This will offset some of the advantage of going with the lighter blue as I’ll either be starting from scratch if I strip the paint or certain Monstrous Creatures will not match the rest of the army.

The original vision for the army will never be achieved. This is the major obstacle for me. Going with the dark, dark blue was the original intent as it appears more natural a color scheme than the lighter blue and the idea was that the Tyranids had adapted to match the terrain on their bases, which the darker blue does brilliantly.

Decision Time


Despite the advantages, I’ve decided to press ahead with the original vision. It looks too good on the base to not follow through and will mean the army has a cohesive aesthetic. So, I’ll be painting furiously for the next month and a half and probably won’t get much practice in with the list but I’ll have a great looking army to play with!

Saturday, March 8, 2014

Railhead Rumble 2014 Part 2


Game 4


This match was against Robert Mims’ Ork-decorated Tau. I, unfortunately, didn’t get any close-up shots of his models, but Robert had done an excellent job merging the aesthetics of Ork/Tau. Our mission was the Relic and our deployment was Dawn of War, with a bonus objective of scoring wounds on an objective which had to be placed at the same location as the Relic. Looking across the table I could tell I’d be in trouble with 2 Sky Rays and 2 units of Broadsides as well as 2 Riptides staring my bugs down. I rolled lucky with Psychic Powers getting Catalyst on both Hive Tyrants and a Tervigon, giving me hope that I wouldn’t be completely shot off the board. I went first and got Catalyst on 6 Units, then pushed the wave of bugs forward. I had my Hive Tyrants unload on the bonus objective, scoring a bunch of wounds, as there was nothing else deployed close enough for them to hit. My Hive Crones unleashed on 1 of the Sky Rays but didn’t blow it up and my Exocrines managed to kill a bunch of Kroot which were deployed closest to the Relic, but they made their Leadership check and didn’t fall back. Robert’s first turn didn’t go so great as he unleashed a furious barrage that barely scratched the Tyranids. If only it stayed like that until the end of the game. Robert hadn’t played the new bugs much, but as soon as he realized the Venomthrope was moving Shrouded saves, he marked it for death and its biomass was spread across the battlefield, getting Robert First Blood. One of my Crones was shot down and the other was Grounded and charged by the bravest squad of Kroot I’ve ever seen. I attempted to get my non-Warlord Hive Tyrant into close combat with my opponent’s Crisis Suit Warlord, but he got destroyed by the overwatch from nearby Broadsides that rolled 6s to hit on over half their dice. By the last turn I had a Tervigon who had claimed the relic and Catalyst on him. I figured I would take a withering amount of fire, but in the end, rolling dice didn’t work my way. 1 unit of Broadsides unloaded on the Tervigon, causing 7 wounds and all I rolled as saves were 1s and 2s. The Feel No Pain wasn’t much better as everything rolled was under a 5. My opponent had First Blood and Linebreaker and I had Linebreaker with my Hive Crone who was still in close combat with Kroot. I did get more wounds on the bonus objective, but still lost the game by 1 on the primary scoring.


Game 5


My last game at Railhead Rumble was against John Connelly’s Necrons. Our deployment was Dawn of War but the mission type was essentially a modified version of the Relic, but with 2 Relics deployed in each of our deployment zones. Sadly I didn’t get Catalyst once with Psychic Powers, and my opponent had a LOT of Wraiths and 3 Night Scythes holding his troops. I had deployed first and my opponent placed most of his army in 2 corners of his deployment zone. Turn 1 was pretty uneventful with Night-Fighting in effect and Tyranids’ short range not allowing me to do much shooting, but I was holding my flyers back in anticipation of my opponent’s Night Scythes entering the board. On turn 2, I moved my flyers towards John’s Relic, hoping to put pressure on his Warlord’s unit. With all the shooting I sent at him I only wounded 1 of his 3 Canoptek Spyders and the rest of the wounds were on his Warlord who didn’t fail a single 2+ save. John’s Night Scythes came on and did what I expected them to, they unleashed everything at my Warlord, bringing him down after all 3 Scythes fired their Teslas and netting John First Blood and Slay the Warlord. The following turns were mainly a Tervigon dying to close combat with Wraiths, Exocrines lighting up said robot shrimp and a unit of them removed by Termagant Fleshborers. Both my Exocrines were then tied up in close combat by the rest of the Wraiths as well as 1 30 man squad of Termagants. The other 30 Gant squad was headed towards my opponent’s Relic, but John had wisely joined a Destroyer Lord to Warriors from the single Night Scythe my Crones had been able to down before running out of Tentaclids. Those Warriors moved towards the Relic and were able to keep unit cohesion so the Destroyer Lord could do his 12" jump onto the Relic, claiming it for the Necrons in the last turn of the game. By the time dice down was called, my remaining Tervigon was holding onto my Relic and John’s Lord had his. John had First Blood, Slay the Warlord and Linebreaker and I just had Linebreaker with my Termagants.

Railhead Rumble was an exciting event and the first time I’d had an opportunity to use my painted Tyranids in an 1850 point battle. Overall I scored 9th place out of 50 (7th place if we’re counting ties as a single place) due to soft scores boosting my battle points. My last 3 games were against tough opponents/lists which ended up in the top 6th Overall. I recommend this annual tournament to anybody in the region who is looking for challenging games and a great environment!

Monday, March 3, 2014

Railhead Rumble 2014 Part 1


Railhead Rumble has now wrapped and was an absolute blast! The results are posted here and the Best Generals were playing Salamanders, Eldar and NecTau. It was a really fun event I had not attended before, with an interesting element of bidding for what missions would be played and what deployment used, so you could try to get missions/deployment that played to your list's strengths. Check out the rules packet here. Now, behold the forces Hive Fleet Severus sent to tear man, space elf and fishmen apart!

Hive Fleet Severus 1850 Points


HQ


Hive Tyrant 2x Twin-Linked Devourers, Wings, Old Adversary

Hive Tyrant 2x Twin-Linked Devourers, Wings

Troops


Termagant Brood x30

Termagant Brood x30

Tervigon

Tervigon

Elite


Zoanthrope

Venomthrope

Fast Attack


Hive Crone

Hive Crone

Heavy


Exocrine

Exocrine


Game 1


My first game was against an Imperial Guard army played by Bruce Stephenson, the mission was Crusade and the deployment was Dawn of War. The image above is from deployment and you'll see a lack of Hive Crones (the other Flyrant is off-camera to the left). My display board wasn't big enough to fit the Crones so they were in a box which I had set under the table before grabbing a drink. I realized in turn 2 I had not deployed them and they came on the board in turn 3, but it cost me some serious threat saturation. Anyhow, I had placed 3 objective markers in the middle of the board, as I have learned well the lesson that this list is an all-in attack on my opponent in a wave of murder by gribbly teeth. As such, I knew by turn 3 at the latest I would have troops holding all three of those objectives and still able to engage my enemy behind his Aegis. I got lucky with my Psychic power rolls and got Catalyst on both Hive Tyrants and the Tervigon with the orange poker chip on its base. Railhead Rumble has bonus missions as well and this one was to accumulate wounds on a Toughness 7 objective in the center of the board. I had both Flyrants move up and caused 9 wounds in the first turn. Beyond that I couldn't do much as my opponent had deployed far out of range of anything that could hit him. Bruce's two tanks and the troops behind it advanced towards the objective I had placed near the center of the board and his Plasma Cannon shots didn't do too much damage to a Tervigon with the 3+ cover it had from intervening models and Shrouded from the Venomthrope as well as Feel No Pain from casting Catalyst. I knew that Plasma tank had to die fast, so I glided my Flyrants in, then shot and assaulted it netting me First Blood. I had Termagants move up towards the same objective in the center of the board and quickly piled them all around it. My opponent lit up my Warlord Hive Tyrant with his Leman Russ Punisher and not even Feel No Pain could save him. I quickly got retribution though as I gave Onslaught to one of the Exocrine from the Zoanthrope so he could Run and Shoot at BS 4. Between the 2 Exocrine's large blast Plasma I put enough wounds on the unit his Warlord was in and he failed a Look Out Sir and Cover Save netting me Slay the Warlord as well. The game ended with me controlling the 3 objectives in the middle of the board and my opponent controlling 2. That plus the bonus mission gave me a full score. Not a bad way to start the tournament!


Game 2


In the second game I played Ben Redleaf, who brought a White Scars force with Iron Hands allies, the mission was Crusade and the deployment was Hammer & Anvil. Somehow, someway I rolled Catalyst for Psychic Powers 3 times again on the same 3 units! Finally I've found something other than Leadership in which my low rolls don't lose me models. We only had 3 objectives to place and I followed with my strategy of placing two near the middle of the board while my opponent placed his 6" from a corner in his deployment. The bonus mission for this game was to knock the objective placed in the center of the table to the left of your deployment edge. Ben didn't think either one of us would score the bonus mission, but I gave it a hell of a try with both my Flyrants moving right next to it and unloading into it getting it about 10" from my victory edge (you can see the bonus objective to the left of the bottom group of Termagants in the picture above). I plodded the rest of my force towards my opponent but like last game didn't have much to shoot at in Turn 1. Ben had a Hunter and 2 Thunderfire Cannons deep in his deployment zone that didn't care much about range and after his Orbital Bombardment didn't do much he killed my Venomthrope with the Thunderfire Cannons getting him First Blood. His bikes came at me and as you can see from the image above it looked like 2 waves rushing towards each other. The bike unit with the Iron Hands Chapter Master knocked my Warlord Flyrant out of the sky and assaulted. I challenged and we were stuck in that combat for a couple of turns with my Warlord not doing much to the Chapter Master with his 3+ Invulnerable save and Feel No Pain saving my Warlord from wounds from the Iron Hand's Thunder Hammer. Eventually, my Warlord fell, but I got revenge by Vector Striking Korsarro Khan and finishing him off with my 2nd Flyrant's shooting getting me Slay the Warlord as well as my Termagants moved towards the objectives near the middle of the board and I got a few more inches of movement with the bonus objective. Ben had a squad of Bikes Outflank and try to take out one of my Tervigons but Feel No Pain blocked some of the wounds. I then charged those bikes with the Tervigon and some Termagants while the other unit of Gants which had been moving towards the center objective. Ben moved a squad of Bikes which had Hit and Run out of assault with my Termagants, towards the objective he had the most Bikes concentrated near and used his Thunderfire Cannons to blow large holes into the Gants that had been holding it. My 2nd Flyrant shot the Scouts holding the objective in my opponent's deployment zone into oblivion and there were no Bikes nearby which would be in range to reach it without moving Flat Out and not shooting my Flyrant which could deny its capture. I had one Exocrine try to finally shoot the bonus objective off the table but got it only 2" from the edge in the last turn. However, more importantly, I had my Tervigon in the middle of the board charge the 3 Bikes which had been in the assault on my Flyrant and what was left of the 30 man Gant squad as well as a unit which had been spawned earlier assault Bikes which were trying to block me from getting within 3" to deny it. It all came down to these rolls, my Tervigon smashed the 3 Bikes into mulched meat and somehow the Termagants won the combat on the other unit of Bikes and the Bikes BROKE from combat moving well out of range to hold the objective giving the 'Nids the win!


Game 3


I knew I was in trouble when the pairings were posted for Game 3 as I was placed against another Austin player and one who is a TO for Texas Games Con (formerly War Games Con), Chris Carlile. Chris brought the Eldar force with all the Distort weapons which make my Monstrous Creatures cry. The mission we were playing was Crusade, again, with Dawn of War Deployment. The reason Crusade was played so much was because many of my opponents bid on Purge the Alien and Kill Points isn't my list's strongest strategy, especially this space elf list I faced, so I bid to bump it to Crusade. The other challenge was that Chris also plays Tyranids and knows the new Codex very, very well. When I rolled for Psychic Powers I only got Catalyst once on a Tervigon and I got Onslaught on both Hive Tyrants. Chris went first and immediately sniped my Venomthrope getting him First Blood. I flew 2 Hive Crones to try and knock down a Wave Serpent but couldn't get through its cover saves. Similarly, my Hive Tyrants and Exocrines tried to knock down a Wraith Knight but its saves resulted in minimal damage. And thus the pace of the game was made, as I did minimal damage to him and he devastated my forces turn after turn. He was playing with the Iyanden Codex so I forged the narrative that his army were veterans from a past Tyranid invasion and knew exactly how to handle them. Chris killed my non-Warlord Flyrant with Distort weapons and did the same to a nearby Tervigon which caused many Termagant heads to explode. I attempted to assault my Warlord into one of the units of Wraith Guard and he rolled a single 6 in the Overwatch and I just knew he would roll another 6, which he promptly did. By the end of the game, Chris had killed all my Synapse creatures and cleared out the remaining Termagants. If ever there was a hard counter to my list, it was most certainly this. So much range, with so many Instant Death weapons and an opponent who knew how to get the most out of them. After the game, Chris was good enough to buy me dinner and a beer while we shared war stories with the other Austin players.

It was a very fun-filled first day and I really enjoyed the variety to the missions with the bidding system and bonus objectives. Stay tuned for day 2!

Friday, February 28, 2014

Hobby Progress Report: Railhead Rumble


 So I’ve been in a mad dash painting the last couple weeks for my first regional 40K tournament, Railhead Rumble! All told, I converted 2 Hive Tyrants, out-fitting them with a good proxy for Twin-Linked Devourers from the Tyrannofex kit. I’ve also assembled 2 Hive Crones, 2 Exocrines, 2 Tervigons and 36 Termagants and got them to a similar quality in paint as well as based all of the models. I’ve not coated any of the models as they’re all still WIP, but hopefully they won’t get too chipped in travel and during the event. I’ve got a force I’m proud to play with this weekend!


Quick Tip: Magnetized Wound Counters


This isn’t an original idea, by a long shot as extra models have been used as wound counters for almost as long as there has existed miniature wargaming, but I wanted to use it for my Tyranids as having a die sitting on their base is not aesthetically pleasing and can lead to arguments on whether you’re counting up on wounds taken or down on wounds received (but honestly people, why would you do anything but count down?).

So, in order to do this wound counting that no opponent could be confused by, I decided to use Ripper models as my Monstrous Creatures’ wounds. That along with 1/4" by 1/16" magnets and a strong adhesive like Gorilla Glue and you’re in business.
 

The first thing you want to do is test which way the magnets are drawn to one another by stacking two together. Then, separate the magnets and glue one to the bottom of your wound marker. If using Gorilla Glue, be sure to lightly wet the surface of the magnet which will be connecting to the bottom of the wound marker before putting the glue on it. Then place the marker in a manner so it will not fall off the magnet as it is drying.


Your next step is to glue the underside of the base for the Monstrous Creature model. Gluing to the underside of the base serves two purposes. The first is that you don’t have a tall stack of magnets showing on top of the base. The second reason is this will reduce the risk of the magnet tearing away from the base through use, as when you remove the wound marker from the magnet attached to the base that magnet will not be pulling away from its adhesion surface. Once you’ve placed the magnet in the glue, if your marker has already dried, you can place it opposite the magnet you’re gluing on the top side of the base to hold the magnet in place until it dries.

After the glue has dried, I generally wait a good 3 hours before even attempting to remove the wound marker, you should paint the magnet so as to disguise it and not ruin the aesthetic. So far I’ve only painted black around the magnets of the models I’m taking to Railhead Rumble, but eventually I will add paint to make it blend with the base itself. The end result is easily removable wound markers that enhance the look of your Monstrous Creature models and give you an easy method of keeping track of the wounds on said Monstrous Creature.

Saturday, February 8, 2014

What to Do With Your Old Army


So now that you’ve begun your journey with a new army, you may find your old army is just sitting on a shelf or languishing in a stack of foam. There’s no reason your army couldn’t be doing something more!

One of the first thing you should consider is whether you plan to play the army again. Perhaps there were models you wanted to add, but never got around to. Or maybe there was a new formation released that changed how you think of the role of a particular unit in your army. As always, careful thought at this stage can prevent a hasty decision. I’ve talked with many players who lamented the fact they played an army, switched forces and got rid of the original army only to want to play them again a year or two down the road. So take a good, long look at all the money, time and talent you’ve invested in your original army before deciding to unload it.

If you can’t see yourself playing your first army again, one of the best ways to give it new life is to use it as a tool to get somebody else into the hobby of miniature wargaming. It can be daunting to start a time-consuming hobby such as ours, but if you have models already assembled and painted you’re not going to use, you may find it easier to convince a buddy to try the game out. I’m not suggesting you give your hard work away for free. Perhaps your friend has something in his possession you would be willing to trade your original army for. Trading among friends has two benefits as it allows you to expand your player base with somebody you already know and enjoy spending time with, as well as gives you access to the army should you ever change your mind and don’t want to have to re-purchase the models new. You could, hopefully, trade again and get them back! Regardless, there is something wonderful in seeing a buddy get enjoyment from running the models you put together and painted and knowing your old Champions are still seeing play, even if you’re not the one playing them.

If you don’t know anybody in your local scene willing to take them off your hands, you should give serious thought to selling your army. Those models you lovingly assembled and painted might be able to finance additions to your new forces. Even better, as with trading your army, they can be a great start to the hobby for a new player! The pitfalls of this, especially if you’re selling on eBay or Craig’s List, is that shoppers on those sites want to make a deal, so you’ll likely be getting less than you paid retail. For some, already painted/based models actually cheapen the worth of the force to the potential buyer as it means time will need to be spent removing paint, bases, and possibly components to get the army to work in the specific way the buyer may require. Keep that in mind, but know what your rock bottom line is. If you can’t let your 2,000 point Chaos Space Marine army go for less than $500, it’s better to re-list an auction than to let it go at a loss you cannot bear.

Those are simply two options for ways to keep your old army active in the 41st Millennium. Though, if you’re like me, you’ll not be able to bring yourself to do such a thing. If you’re fortunate enough to have the space, creating a display cabinet for your forces can be worthwhile. Just don’t let them sit idle too long. Hopefully, if you decide to keep your army, the day will come when you’ll want to through them feet-first into battle again!

Sunday, January 26, 2014

Forging Your Narrative


Having come to the miniature wargaming hobby from years of role-playing games, I’ve embraced the idea of using my miniatures to tell a story of epic conflict in the 41st Millennium. I wholly  believe even the most competitive tournament player can increase his and his opponent’s enjoyment of this hobby by peppering their games with bits of a story and letting the game itself determine the ending. How does one go about doing this? I’m glad you asked as I’ve got a few tips on that.

Name your Units


Every major battle in the history of warfare has names of generals, pilots and even grunts who did something heroic enshrined in the annals. Names such as Churchill, Patton and Rommel are remembered from World War II for their leadership, command and villainy. Why should it be any different with warfare on a miniature scale? The place to start is with your characters, champions and sergeants. You may be using named characters in your army but don’t let that inhibit your imagination! What good is Marneus Calgar without the legions of Ultramarine sergeants who lead the individual units of power armored soldiers? Whether tactical squad or terminators, the models on your tabletop represent somebody who was born, trained and fought in the grim dark future. And they should have a name! Latin names are used for the Imperium of Man and you can find many examples online. Alternatively there are several name generators for characters in 40K you can make use of online as well.

Create Epithets for Challenges


I can say confidently that challenges between champions in 40K are more memorable when they happen between characters you and your opponent have named. But even still, you can color the exchange between your characters further. It only takes a few minutes of time to come up with an epithet from your army’s point of view to one of the other armies in 40K. My Chaos Lord Molitor loved to challenge loyalist sergeants by saying, "tell your false emperor to defecate or get off the golden throne!" And in 100% of the games in which Molitor said that, the imperial sergeant would stand up. This adds a memorable moment your opponent will remember about your game and for tournament players, a colorful epithet can score you fluff points in a competitive scene where you need every point you can get.

Use the Terrain to Frame the Narrative


If you’re playing on a battlefield full of ruins (which is a favorite for their awesome cover save) it’s a good idea to discuss with your opponent what the situation which led to the meeting of your two forces was. Perhaps your opponent’s Necrons were awakened by your Tyranid’s invasion of an imperial Hive world. Or maybe you've got a lot of forests and hills on your tabletop, spend a couple minutes to come up with a reason your forces are squaring off in the wilderness. Context to the battle can increase your enjoyment of the specifics of the terrain you’re battling on.

Create Elements to Enhance Your Battlefield


Whenever a vehicle gets wrecked, but doesn't explode, it becomes a new piece of terrain. I've found turning a wrecked vehicle over can be dangerous for the topside of your model. One of the easiest, and most impressive, ways I've found to enhance the battlefield is creating smoke plumes for wrecked vehicles. There are many great tutorials on the web, but essentially, you only need pillow stuffing, black spray paint, an electric tea light and hot glue. With it you can add an element to your wrecked vehicles which enhances the feel of the battlefield by simulating a fiery wreck!

In conclusion, I've found adding these elements greatly increases my enjoyment of miniature wargaming, even when I'm losing a game, I’m having a blast! And that’s the entire point of this hobby. If you’re not enjoying every moment of assembling, painting, basing and playing with your models, you may want to try a new hobby.

Sunday, January 19, 2014

Acquiring Models for a Second Army


If you’ve come to the decision on what your next army will be your biggest obstacle will be  acquiring the models needed to field your new force. If you are a gamer first, I cannot stress enough that you should have an army list in mind before purchasing models. There are 2 main ways to acquire models, buy them new and buy them used. Both have their advantages and disadvantages, but with knowing your options you can get every single model you need to field a force which will shake the pillars of the 41st Millenium!

Buying New


The main advantages of buying models new from Games Workshop or your FLGS is that you’ll have a blank canvas to assemble the models with whatever options your specific needs require. Especially when a new Codex comes out with weapon options not available in older kits, you’ll do well to buy the new kits with those options available. Then you’ve got full control on how the models are assembled, how well mold lines are cleaned, what options are used and most fun for me, how the models are posed. Some of the most fun I’ve had in the hobby aspect of miniature wargaming has been in using the poses of my models to show character not otherwise presented with the model. If you’re buying new you owe it to yourself to experiment with Green Stuff and pinning to take your figures beyond the instructions. When I was working on my Chaos Space Marines last year I knew I was going to have Plague Marines with Power Fists. I had a specific pose in mind for how a particular Plague Marine Champion would be standing, but there was an unsightly gap left between the Power Fist and the torso of the model. I had bought some Obliterators as well as Plague Marines and paid close attention to how Games Workshop modeled the skin on the Obliterators. After taking a chunk of wet Green Stuff and filling the gap on the Plague Marine with it, I used a straight clay tool to create similar lines. The end result was a patch of diseased skin which allowed the form of the model to look complete and enhanced the overall presence of the model.

The main disadvantage of buying models new is the price. Many hobbyists experience sticker shock when they see how much a new kit will run. Personally, I look at prices for models as an investment in time. I look at how many hours the price of the model would require me to work and compare it to how much time it would take to construct and paint the model and how often the model would get fielded. If you’re a hobbyist who enjoys assembling and painting, the amount of time used in those endeavors should go in the, "pro," category for purchasing the model. If you’re more interested in playing a game with the model and plan to pay somebody else to paint it, you’ll want to factor in the cost for painting with the cost of the model itself. If the model is a lynchpin in my army and I know I’ll get many hours of play out of it, the purchase becomes all the easier. There are many who lament the cost of miniature wargaming, but I truly feel if you compare the amount of time you’ll spend assembling, painting and gaming with the model, you may find the cost per minute of enjoyment is actually relatively minute. Compare it to the cost of viewing a 90 minute movie at your local theater, for instance, and you may find that $50 Space Marine kit is actually much less of a cost per minute. Still, nobody is made from money and you may find the cost of a new kit to be prohibitive to making the purchase for a variety of reasons. Which leads us to your next option in acquiring the models you want.

Buying Used


Cost is one of the biggest advantages for buying models used, both in time and money. If assembling models is not something you enjoy, finding a fully assembled Hive Tyrant on eBay can be a no-brainer for you, especially if you can get it for half the cost of buying the kit new. The value of searching eBay is even better for model parts. Say you want to kit-bash a model that has never been supplied by Games Workshop, like a Twin-linked Devourer for your Hive Tyrant. You would like to use pieces off a Tyrannofex to do it, but buying a full Tyrannofex kit new doesn’t meet your cost analysis, chiefly since you aren’t planning on fielding Tyrannofexes or really using the rest of the kit but the 2 pieces you’re interested in. Bits sellers on eBay and across the web can be the most economical solution for you. These individuals and in some cases companies, open up model kits and sell pieces off the sprues separately. You may end up paying a premium for an individual piece of a kit, but if it’s the only piece you need from that kit and it’s a 1/6 of the cost of the kit itself, it just may be worth hitting, "buy it now." Alternatively, if you’re looking to start a whole new army, purchasing somebody’s used army off eBay can be a great savings in assembly time and monetary cost. If this is the case you find yourself in, I recommend carefully considering which models are in the auction. The best deals are those which have a variety of the units you’re planning to field and in generous numbers. As always, a few minutes of price research can save you money. If you’re looking to play Chaos Daemons with a majority of Khorne units, compare the number of models in the auction to what you actually plan to use. Then go to the Games Workshop website or Amazon.com and compare the cost of buying the models new to the overall cost of the auction. If there are models you don’t plan on using in the auction, make a plan for what you’ll do with those models you don’t wish to field. There is an advantage to keeping those models as it allows you to vary your tactical options, but if you get a Great Unclean One you never plan to hit the tabletop with, you may want to see if there is anybody in your local community who could use it, then make a trade or outright sell the model to anybody interested. But there are also downsides to buying models used.

The biggest detriment I’ve found to buying used models has been getting models in a shoddy paint-scheme which you’ll need to spend time undoing. It’s not the end of the world if a used model arrives in colors which clash with the rest of your army. Dipping models in Simple Green for a few days and brushing off the paint can be quite easy, if the previous owner didn’t coat the models with a sealant. Additionally, some gamers don’t clean mold lines or perhaps poorly cut pieces off the sprue leaving the model with an obvious indicator of poor workmanship. Finally, used purchases can already be based in a manner which does not gel with the rest of your army. All these sorts of blemishes can take time to repair and should be factored into your assessment before purchase. If you will spend more time fixing a used model to your liking than you would spend assembling a new model, the initial monetary cost can quickly be offset with time and frustration. This is doubly so for models which were assembled in a manner so they cannot be easily disassembled. If you want to swap arms on a Monstrous Creature, for example, and the original owner used plastic glue to assemble the model, you may do severe damage to the model trying to pry off the bonded arms. But if you go into the purchase aware of these risks, you can very quickly assemble the necessary components to get your forces on the tabletop.


Tuesday, January 7, 2014

Starting a Second Army


It happens to every wargamer. After a year, or more, of fielding variations from the same Codex against one of the fifteen armies in the 41st millennium, a gamer begins to wonder. Perhaps Dark Angels being able to take Bikers as Troops with Sammael has got you considering the possibilities of leaving Chaos for loyalists. Or maybe the withering, long-range firepower from a Tau’s Broadside has left you wanting to abandon your boltgun. For some of us, simply wanting to change up your available tactics is enough to cause you to venture out and get a second force to bring to the table. But investing money and time in acquiring, assembling, not to mention painting a new army can be daunting. With some thought you can assemble a new force that is rewarding to collect and play without wasting money or time.

Know Why You’re Playing


Many gamers will already have an idea of which Codex they’ll want to play next. But even if you’re absolutely sure Eldar are the next best force for you to field, it’s worth taking a moment to consider a few things. First you need to know why you’re choosing that particular force. Is it because they have cool-looking models? Or maybe it’s because your next army of choice is smashing face on the tournament scene. Perhaps the fluff you’ve read about your next army was inspiring and you can’t wait to see if it’s as awesome on the tabletop as in the stories. Whatever your particular reason for wanting a second army, knowing what about the miniature wargaming hobby you enjoy the most should be a deciding factor in why you’ve made your choice. Once you’ve answered that you can start exploring your options with a clear purpose.

Research Availability and Cost


One of the main deterrents for investing in a second army is availability of models and cost of said models. Before you jump in head-first on an eBay spending spree, head over to your local gaming store and see what’s filling the shelves. Be careful at this step, as it will be tempting to pick up a favorite model or battleforce box which would defeat the point of this exercise. Make note of which units are available and how much they cost. Some models can only be purchased second-hand or through Games Workshop’s online store. Take this in consideration as well, as I can speak from experience, there will be times where you’ll need just one more specific unit to complete the army list you made for this Saturday’s tournament and your local store doesn’t have it.

See How the Army Plays


After you’ve got an idea of how available the models you need are, make some time to watch a few games of how the army plays. You can do this either at your local store or by looking at video battle reports like the ones at Miniwargaming.com (just be sure you’re watching videos with your army of choice in the current game edition). The advantage to heading to your local store to see how your possible second army plays is that you can ask questions of the people playing the games and get a better understanding of why the army plays as it does. Just be polite and don’t interrupt the people playing the game and you should get some insight into what specific units can do and how effective the army is. It’s also a good idea to head to online forums and read army lists, battle reports and view conversion/painting threads as they can give you ideas of the potential (and drawbacks) of the force you may not have thought of.

After having done this research you should have an idea of the army’s playstyle and whether it aligns with your own. If you’re a player that enjoys aggressively charging at your opponent and sweeping them in close combat, you might want to rethink going with that Tau gunline army. Hopefully you know somebody in your local area who fields the army you’re thinking of trying out. Ask if they’d be willing to meet up with you and loan you some models to play a small 500 point or less skirmish. Whether it’s assault tactics, psychic trickery or mechanized heavy weapons Warhammer 40K armies each bring something different to the table and it’s important you are comfortable with the style of play that works with your potential force.

Get the Codex & Build Lists


If you've gotten this far in the process and are still loving the idea of fielding this force, your next step is to get the Codex. Some game stores have a lending library of books where you can borrow an army Codex for a day or two. Otherwise you can buy the book new at your local store, online or at a used book store if you want to save some cash. A big consideration is whether the army you’re wanting to play with has a Codex created for the current edition of the rules. Older edition Codexes might be fun reads, but they have a limited shelf life when they won’t be any use in tournament play. Pore over that army book to see what unit options are available, what wargear they can get, how many points they cost and start making an army list.

Try to make a list at different point sizes and experiment with which units you include. While you could just look online for whatever netlist is dominating the tournament scene, you’ll get a greater understanding of what the army’s potential is by creating your own combos. It’s all theory at this point, so all you’re investing is a bit of time but this step will help determine the most efficient path to acquiring the models you’ll want to field in your next army. One last consideration before taking the plunge into buying models is whether your second army can ally with your first army. If you’re planning on keeping those models around it’s worth considering if they can fill gaps in your second force. Some of the most devastating lists I’ve played against have been a combination of 2 armies that have amazing synergy together.

Once you’ve gone through these steps you’re ready to buy, build, and paint the models for your next 40K army. You’ll now know which models you need to start playing the new force and remember, 40K armies usually start small and evolve over time. If you take your time to study the army first before buying models, you’ll see the benefits of fielding most, if not all, of the models you have purchased and will have reduced time, as well as cost, of trial and error.

Wednesday, January 1, 2014

40K New Year’s Hobby Resolutions Tips


Happy New Year, gamers of the 41st Millenium! It's 2014 and with Warhammer 40,000 6E still going strong with a shiny new Tyranid Codex right around the corner, it’s time to set some yearly hobby goals. While many will vow to paint 120 Termagants before the first local tournament in 4 days, the vast majority will fail miserably within the first day of painting. But you don’t have to be one of those people. If you follow five simple rules for making (and keeping) your New Year’s hobby resolutions, you’ll meet your assembling, converting, painting and basing goals.

1. Make Your Hobby Goals Specific


One of the biggest tips you'll find from the myriad sources of goal-setting on the web is to be specific with your goals. Having a goal such as, “paint more minis,” won’t help you achieve much since if you paint a single mini in a year’s time, then you've technically achieved that goal. A better goal would be, “completely paint a single mini a week,” The difference is the second goal is specific and the first one isn’t. The more specific your goal is, the better you’re able to measure the result.

Similarly, you should specify the level to which you would like to achieve with your painting. Are you going for table-top quality painting or are you looking to win a Golden Daemon? Deciding how detailed you want to be in your painting means you'll have an idea of how much time you'll need to invest per model. Thinking of a specific goal or resolution allows you to plan out your goal and forces you to be more accountable.

Not specific: “I want to paint more minis this year.”
Very specific: “I want to paint 24 Termagants to a table-top standard, complete with bases by February 1st.”

2. Make Your Hobby Goals Realistic


What if you had 72 Genestealers and you told yourself, “You know what? I'm going to have all 72 Genestealers painted to a Golden Daemon standard by next weekend!” While I'd laud you for wanting to spread the Hive Mind’s forces to the stars, you should be honest with yourself: that goal just isn’t realistic (for most hobbyists). The same is true for all your hobby resolutions. If you have 72 Genestealers to paint, don’t try to speed paint all of them in one weekend, and certainly don’t make it your initial goal. A huge painting goal like that can be overwhelming and cause you to get frustrated and give up at the first bump in the road. Instead, set a realistic goal that takes smaller steps toward reaching your ultimate goal.

Not realistic: “I want to paint 72 Genestealers to a table-top standard by next Monday.”
Very realistic: “I want to paint 6 Genestealers to a table-top standard per week for 12 weeks.”

3. Determine Your Hobby Goal Road


Don't think your hobby goals will be reached by only telling yourself you want to achieve them, that’s only dreaming. It’s critical to think about—and more importantly plan out—how you’re going to reach your painting goals. Just like with the hobby goal itself, your hobby road needs to be specific and realistic.

Bad road: “I am going to paint 20 Gargoyles by February 1st by painting more.”
Good road: “I am going to paint 20 Gargoyles to a table-top standard by February 1st by painting 4 miniatures per week instead of painting one a week.”

4. Make Your Hobby Goals Known


Accountability is key if you really want to stick to your New Year’s hobby resolutions. Instead of keeping your goals a secret in a notepad buried under paint palettes and Middenland Tufts, share your goal with your regular opponents, friends, family or coworkers (if they're into miniature wargaming). Post your hobby goals on your Facebook page or blog. Post pictures with updates to the forum on Bell of Lost Souls or a local hobby forum to tap into communities who can help keep you on track, offer advice and cheer you to the finish line. By telling more people, you might find somebody who is attempting to accomplish the same goals you are. If you exchange stories of your struggles and accomplishments you’ll be more likely to see your hobby goals through to the end.

Not accountable: “I told my six-month-old nephew that I wanted to paint 3 Tervigons by the first day of summer.”
Very accountable: “I posted my 3 Tervigons painting goal on Facebook for all my hobbyist friends to see.”

5. Make Your Hobby Goals Rewarding


We 40K enthusiasts have the luxury of taking satisfaction from seeing freshly painted Trygons fielded on the table-top after we’ve painted them. However, just meeting a goal doesn’t always provide sufficient motivation. That's why we're rewarded for many of the things we do. At home your significant other will, likely, let you spend an evening gaming if you've helped out with the dishes. How eager were you to help out at home when you knew you wouldn't have to argue about rolling dice with your buddies instead of watching Downton Abbey? Use a similar tactic with your hobby goals. Create a reward system before you start working towards your goal. A lot of gamers hold to a rule that you can’t buy any new models until you've completed painting an already purchased model, which is incentive to get a new Unit described in the Codex that is coming out soon as well as finishing a model that’s been sitting on the shelf grey for far too long. Once you have come up with your incentive, imagine how great it will feel to get it once you’ve reached your goal, and let that reward be your motivation.

Bad reward: “If I get this Trygon painted by next month I’ll get to see it on the battlefield.”
Good reward: “If I get this Trygon painted to a table-top standard by February 1st, I’m going to field it at the Las Vegas Open.”